How to Setup the Capstorm Recycle Bin
By default, CopyStorm has a single snapshot policy named the Default Recycle Bin. The Default Recycle Bin is a regular snapshot policy, implemented using the same features available for custom snapshots, with a few limitations.
- The name of the Default Recycle Bin cannot be changed.
- The filter used by the Default Recycle Bin cannot be changed.
By default, the Default Recycle Bin is not enabled and you should make a few decisions before enabling it.
- Do you want to restrict the tables where the recycle bin is used?
- How many days do you want to keep records in the recycle bin?
- Do you want to keep records from some tables longer than others?
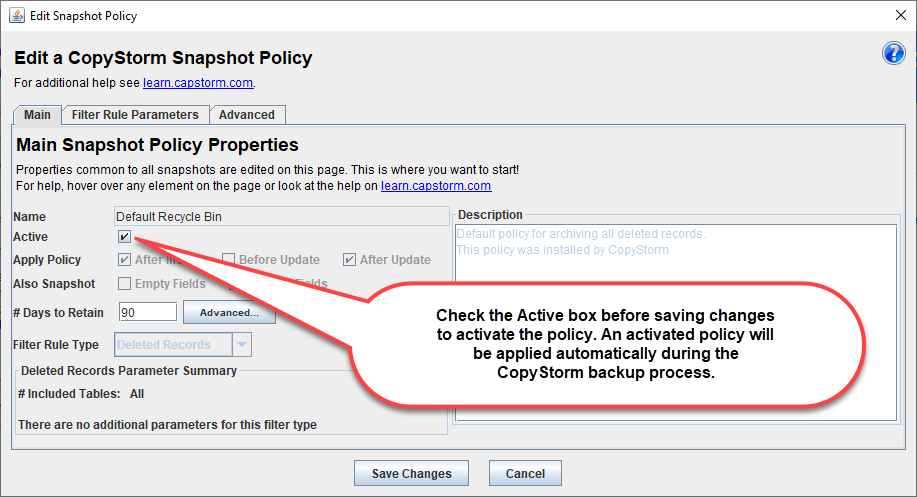
Once you have made these decisions and applied them to the Default Recycle Bin, simply enable the snapshot and CopyStorm will automatically manage the Default Recycle Bin as part of a backup.
Example of a Default Recycle Bin Setup
Prior to setting up our recycle bin, we have made the following choices.
(Your criteria will likely be different!)
- All tables except history and change event tables will be managed by the Default Recycle Bin.
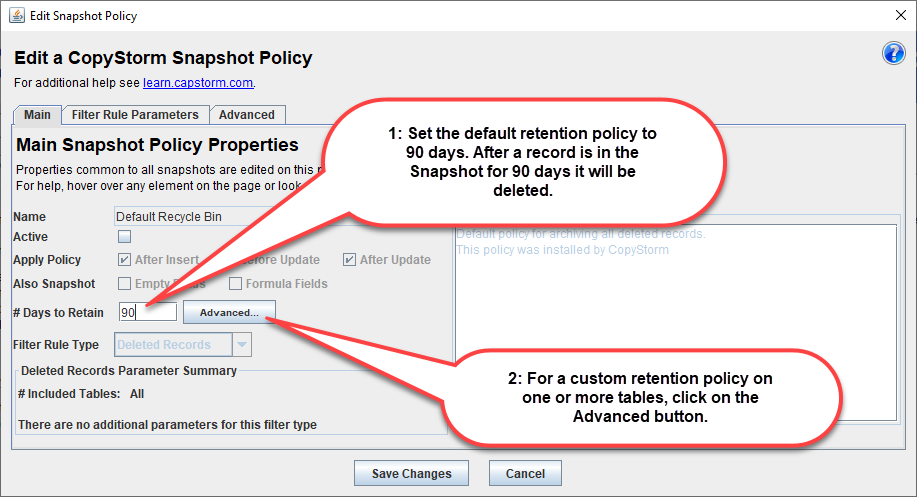
- The default retention period for a record will be 90 days (after 90 days a record will be deleted from the snapshot).
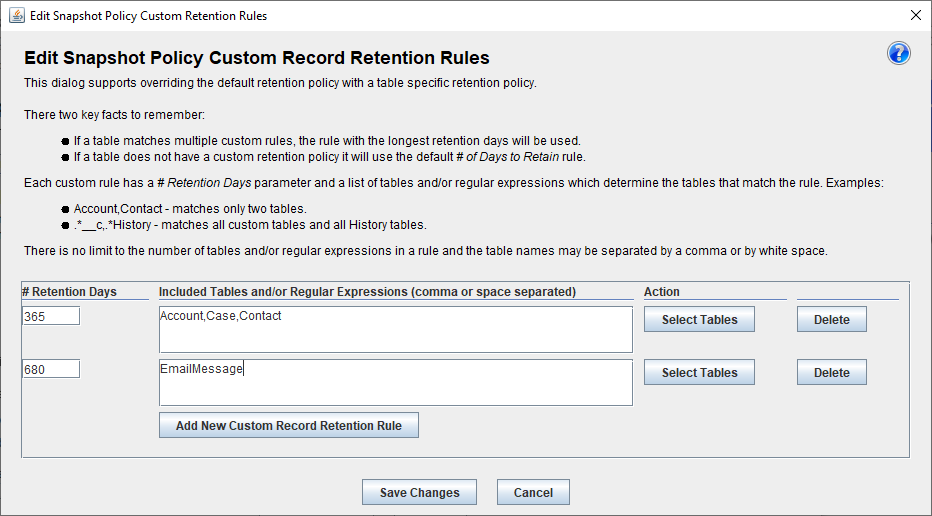
- EmailMessages should be retained for a two full years.
- Accounts, Contacts, and Cases should be retained for a full year.
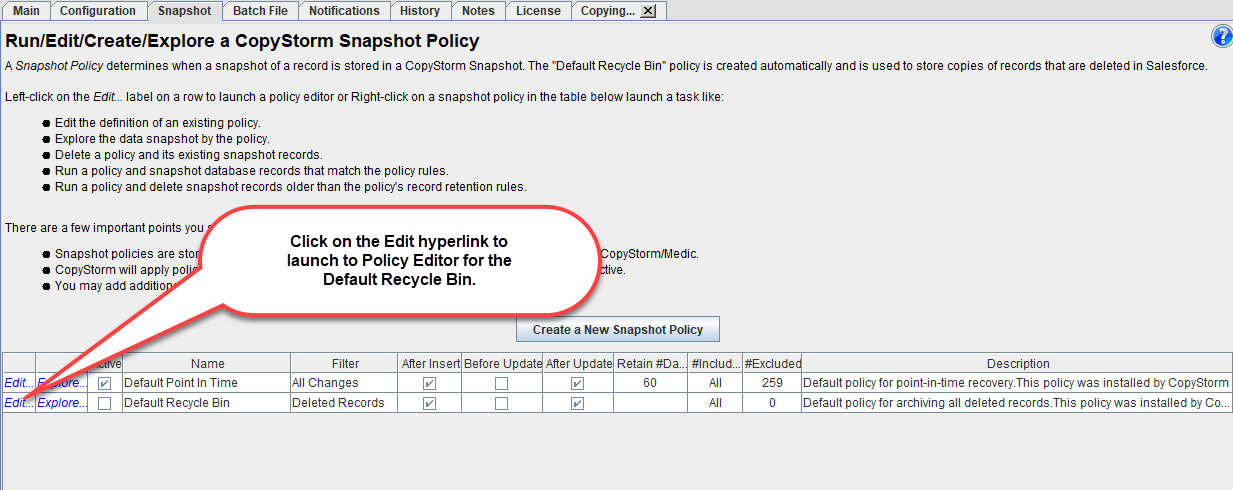
Launch the Policy Editor for the Default Recycle Bin
Set a 90 Day Default Record Retention Policy
Add Custom Record Retention Rules
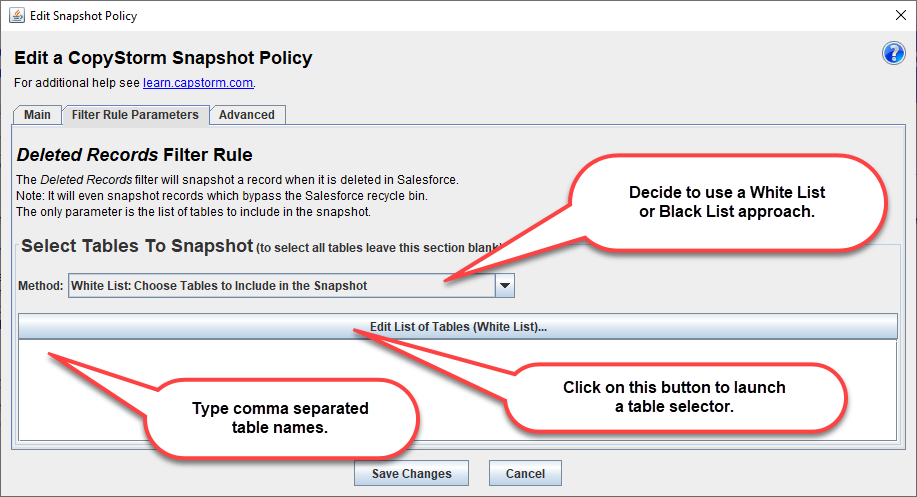
Select Tables to put in the Recycle Bin
There are two basic ways to select the tables to include in the Recycle bin.
- A White List can be used to indicate the tables to include.
- A Black List can be used to indicate the tables to exclude. All tables not on the black list will be included.
For additional help see the White/Black List documentation.
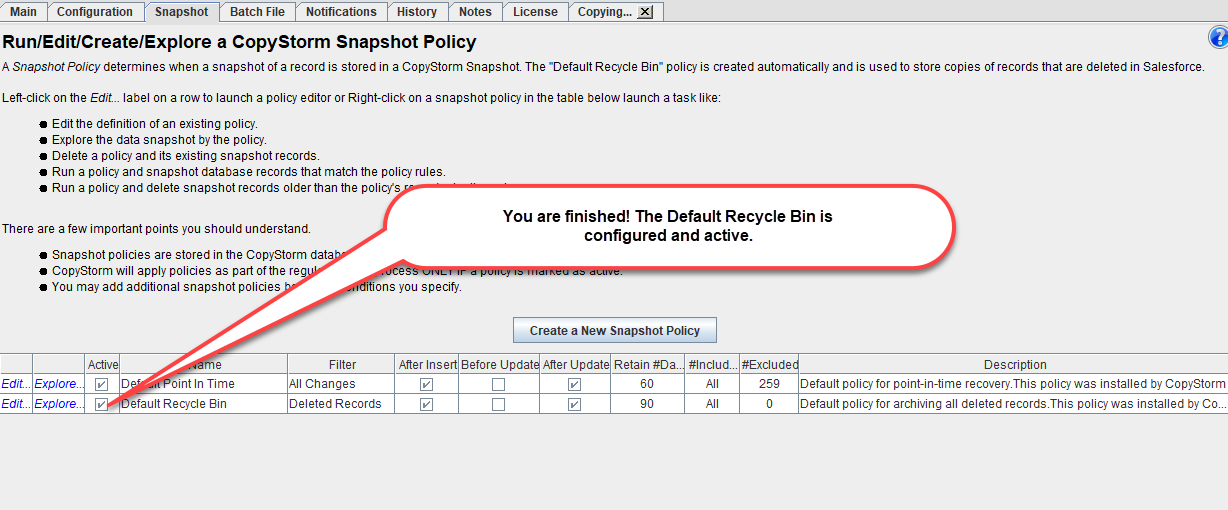
Activate the Default Recycle Bin
Congratulations! You have successfully setup the Default Recycle Bin.
