Snowflake Connection
Initial Steps
Before running CopyStorm for the first time, create a dedicated Snowflake database for your Salesforce data.
Connection String
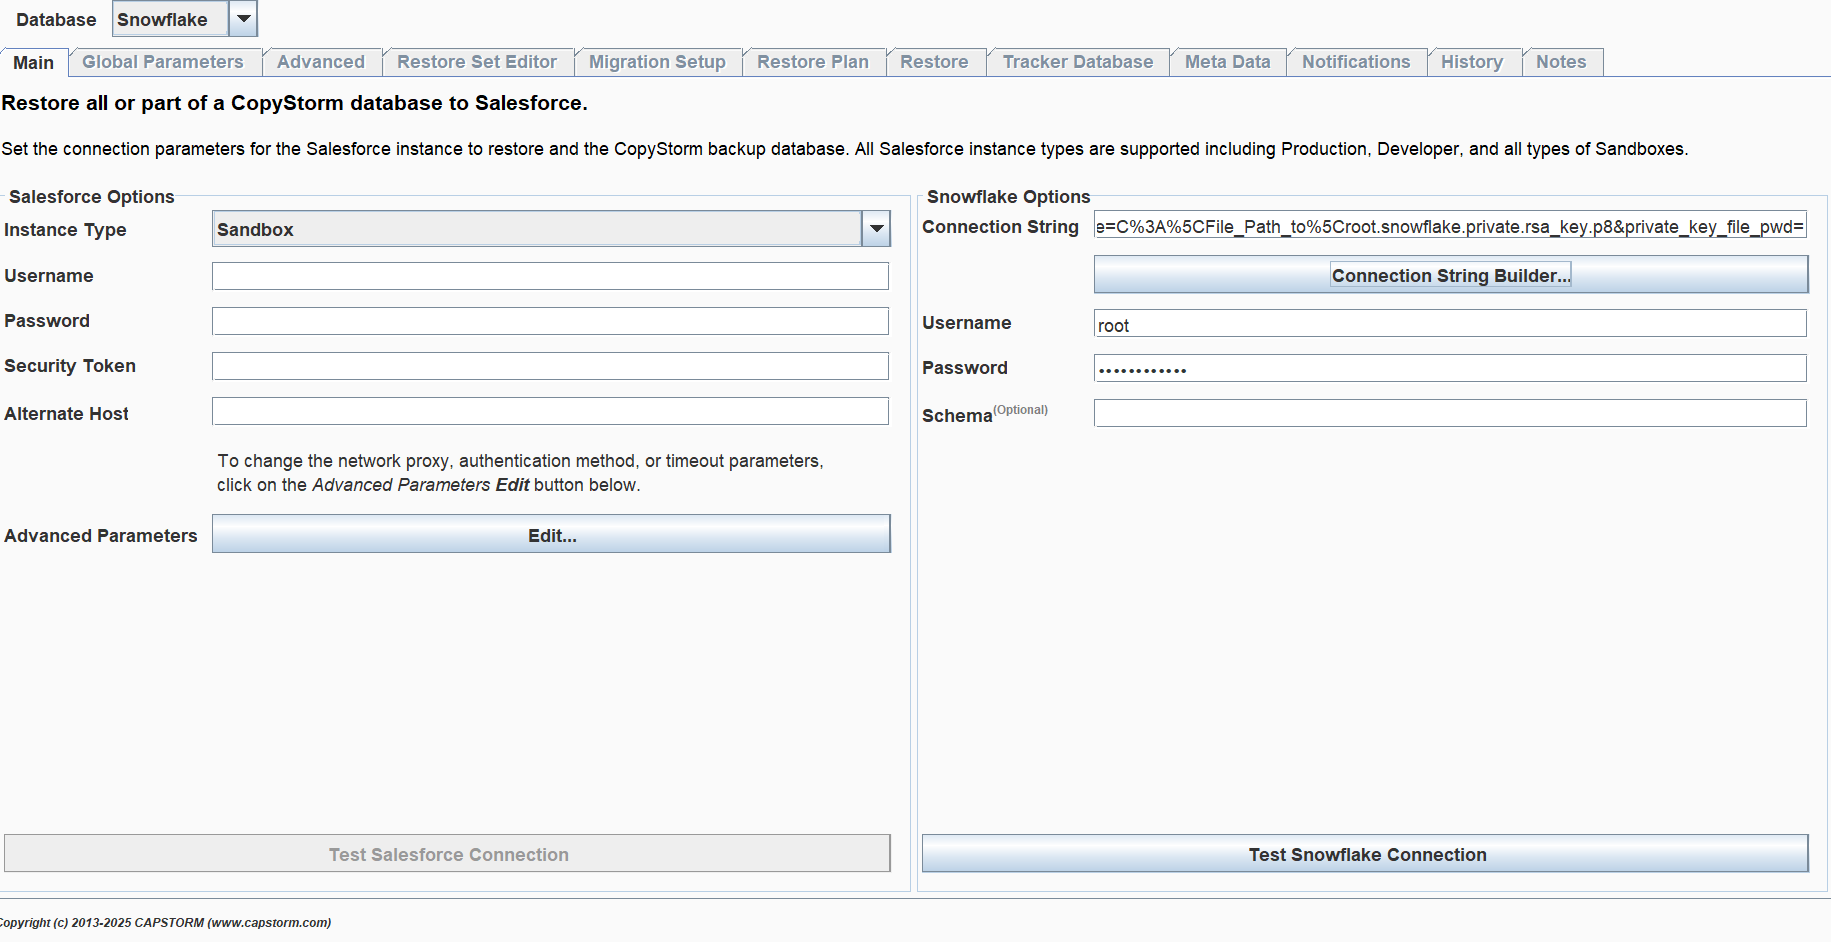
Compared to the other Database types, Snowflake’s connection string is more complex and carries more information. For this reason, it is recommended to use the Connection String Builder to create a valid Connection String.

Connection String Builder
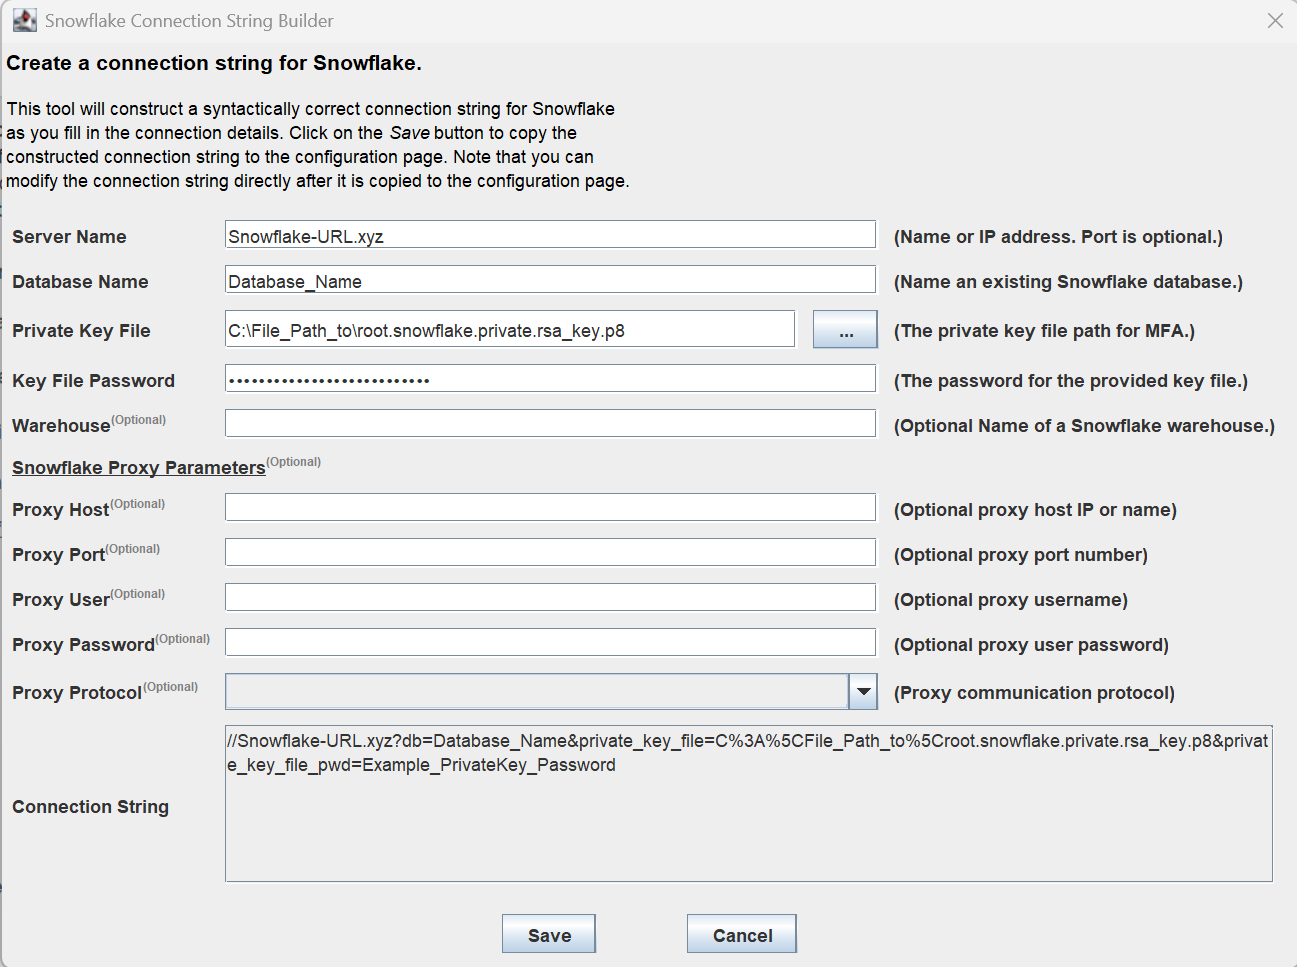
After clicking on the “Connection String Builder” button, a dialog menu will open, as seen below.

| Parameter | Description |
|---|---|
| Server Name | The IP Address, URL, or server name of the snowflake instance. Port number is optional. |
| Database Name | The name of the Snowflake database that CopyStorm will populate with Salesforce data. |
| Private Key File | The file path to the Snowflake Private key. For more information on Private Keys and Snowflake’s key-pair authentication, refer to Snowflake Documentation. |
| Key File Password | If your Private key was configured to require a password for use in authentication, enter it here. If your Snowflake Private key was configured as to not require a password, this field can be left blank. |
| Warehouse (optional) | The name of a Warehouse in Snowflake that you wish to use. For more information on Snowflake Warehouses, refer to Snowflake Documentation. |
| Proxy Host (optional) | The IP address, or URL of a proxy used to connect to a Snowflake instance. |
| Proxy Port (optional) | The port number associated with a proxy used to connect to a Snowflake instance. |
| Proxy User (optional) | The username to authenticate a request with a proxy used to connect to a Snowflake instance. |
| Proxy Password (optional) | The password used to authenticate a request to a proxy used to connect to a Snowflake instance |
| Proxy Protocol (optional) | The protocol by which a connection will be made to a proxy used to connect to a Snowflake instance. Select either HTTP, or HTTPS. |
