Partition Editor
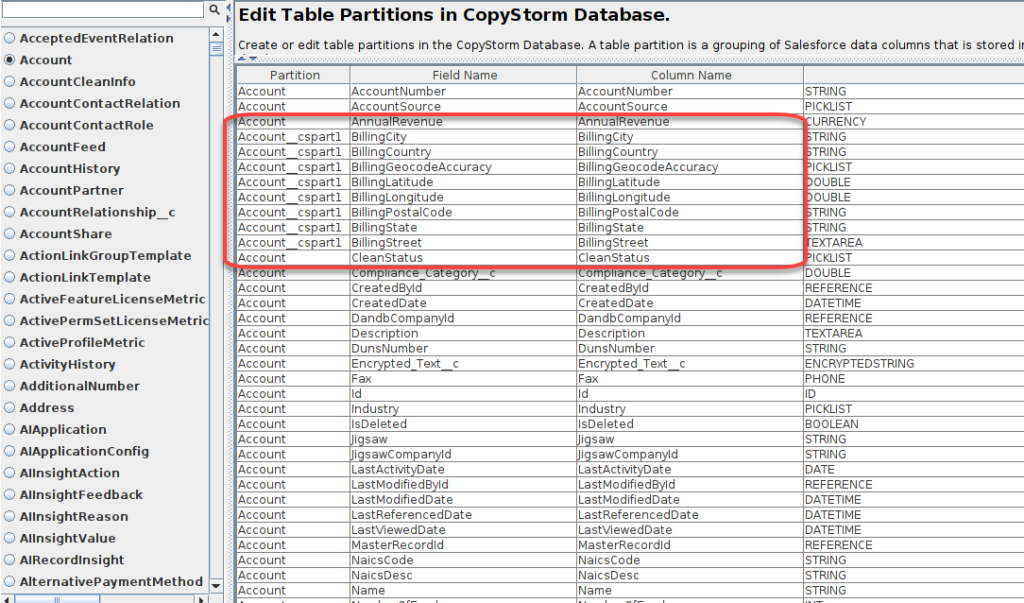
The CopyStorm/Medic Partition Editor tool modifies the schema of the CopyStorm database to vertically partition CopyStorm Salesforce data tables into multiple database tables.
This tool is typically used when a Salesforce object is wide enough that it cannot fit into a single SQL database table. For example, if the Salesforce Account and Contact objects both have the maximum number of custom fields and Person Accounts are enabled. This can cause a single Salesforce object to have more than 1,000 fields.
In the scenario where partition creation fails for any reason, the next partition creation attempt will pick up where the last partition creation failed. When a partition is in a partial state due to a failure, CopyStorm jobs will skip over backing up records to this table until the partition is completed.
This CopyStorm/Medic tool provides a way to resolve database error messages indicating that a record is too large to fit in a database table:
- MySQL: “Row size too large (> 8126)”
- SQL/Server: “Cannot Create a row of size 8765 which is greater than the allowable maximum row size of 8060”
- PostgreSQL: “row is too big”
Running the Partition Editor GUI
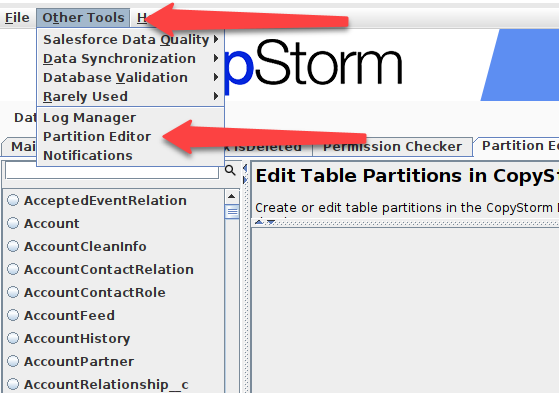
To access the Partition Editor GUI:
- Select “Other Tools” from the top-level menu.
- Select “Partition Editor” in the dropdown.
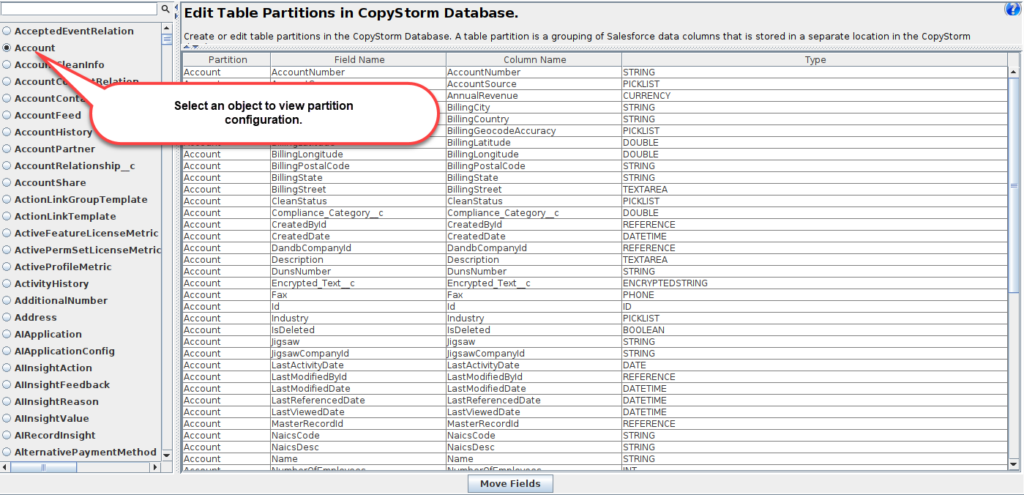
A list of objects in the CopyStorm database is displayed on the left – select an object to view its partition configuration. After selecting an object, the following information will be displayed:
- Partition Name
- The CopyStorm database table name for the table storing the field.
- Field Name
- The Salesforce field name.
- Column Name
- The CopyStorm database column name for the column storing the field.
- Type
- The Salesforce field type.
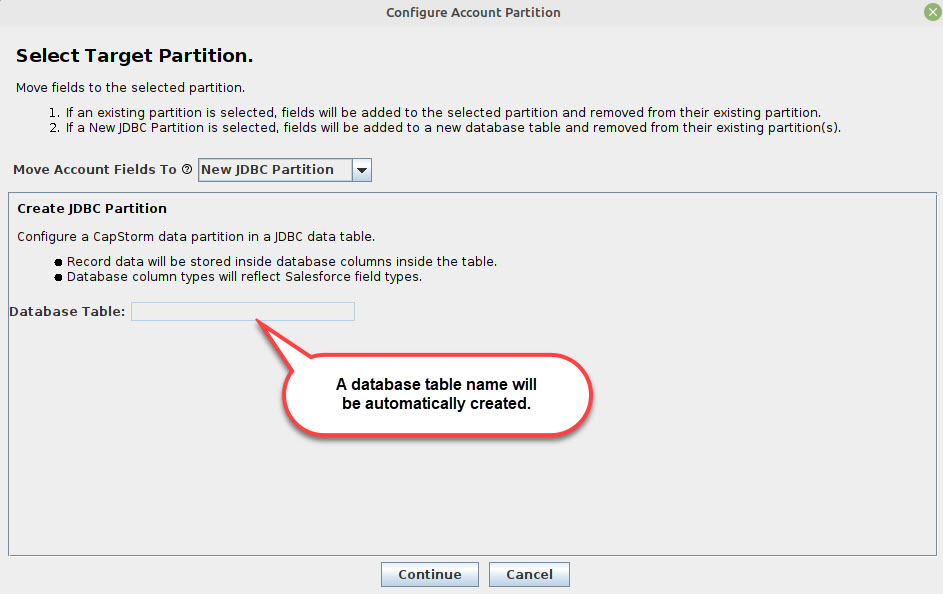
To move fields between partitions, or to create a new partition, click on the “Move Fields” button. This button will open a pop-up window displaying available partitions and configuration options to configure a new partition.
The “Move [Object] Fields To” drop-down controls the target partition.
- If a pre-existing partition name is selected, then any fields already in the target partition will not be available to select.
- If the “New JDBC Partition” option is selected, then CopyStorm/Medic will create a new database table to hold the selected fields.
Configuration parameters for the target partition type will be displayed below the drop-down.
Data partitions can be created in:
- The SQL Database, as a new JDBC Table.
- A local folder on the CopyStorm server.
- An AWS S3 Bucket.
The following screenshot displays the configuration panel for creating a new JDBC Database Table partition:
Clicking on the “Continue” button will open a pop-up for Field Selection:
- All selected fields will be moved to the target partition.
- The source partition for each field is displayed next to the field name.
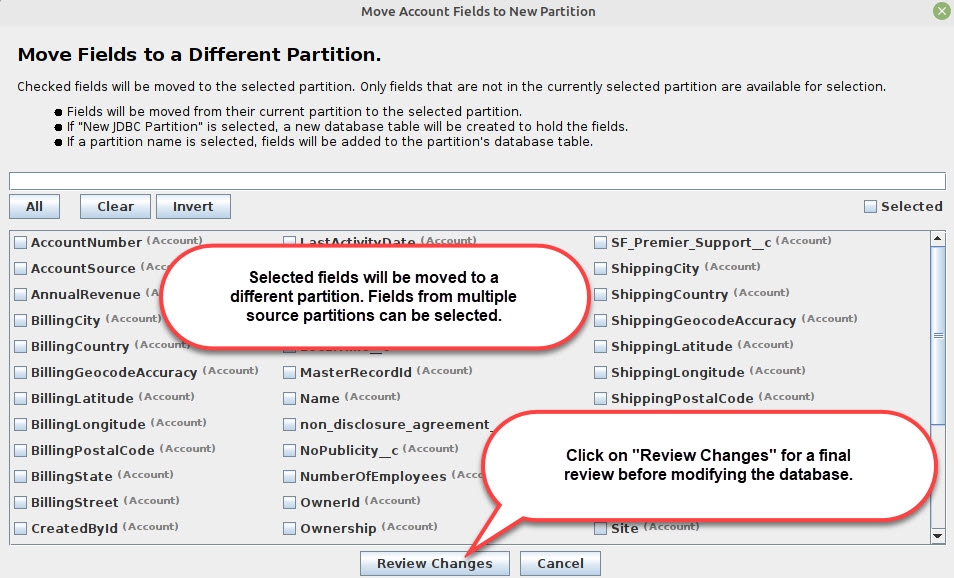
After clicking on the “Review Changes” button, the selected fields will be displayed – highlighting the source partition(s) that currently contain the fields.
To perform the changes and update the CopyStorm database schema, click on the “Apply Changes” button. Clicking on the “Apply Changes” button will cause CopyStorm to:
- DROP from the target partition any pre-existing columns for the selected fields.
- This is to ensure that the partitioning process can be retried should any issues be encountered during the partitioning process.
- Create schema in the target partition.
- If “New Partition” was selected, a CREATE TABLE statement will be executed to create the new partition.
- If a pre-existing partition was selected, an ALTER TABLE statement will be executed to add the selected fields to the target partition.
- Copy field data from the source partition(s) to the target partition.
- Update CopyStorm metadata for the selected fields.
- DROP the data columns from the source partition(s).
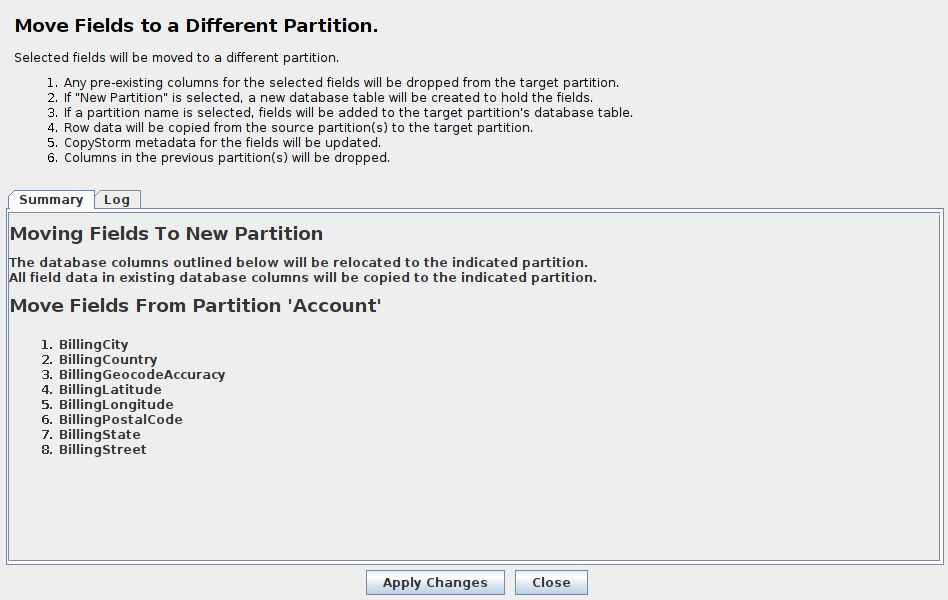
While the partitioning process is running, status will be displayed in the “Log” tab. When the partitioning process has completed, the log will indicate that the job has finished.
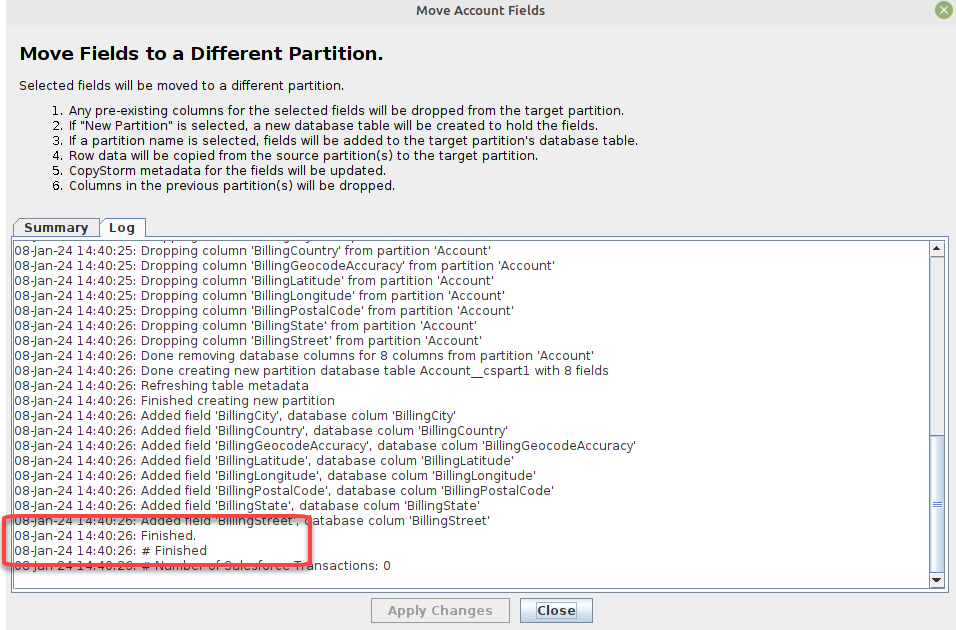
After closing the pop-up, the Partition Editor will display the new status of the selected fields.
