Job Editor
The Job Editor tab is used to create a new job and corresponding tasks. The Job Editor table can also be used to view the history, status, and log data for each task.
Step 1: Create a New Job
Before creating a new job, click on the “Clear Editor” button. The most important data to enter is:
- Job name — a unique, human-readable name for the job.
- Description — a detailed description of the purpose of the job.
The two check boxes control job behavior:
- If the “Active” box is not checked the tasks in the job will not be ran by CopyStorm/JobRunner.
- If the “Deleted” box is checked the job will be considered deleted but still kept in the CopyStorm/Director database.
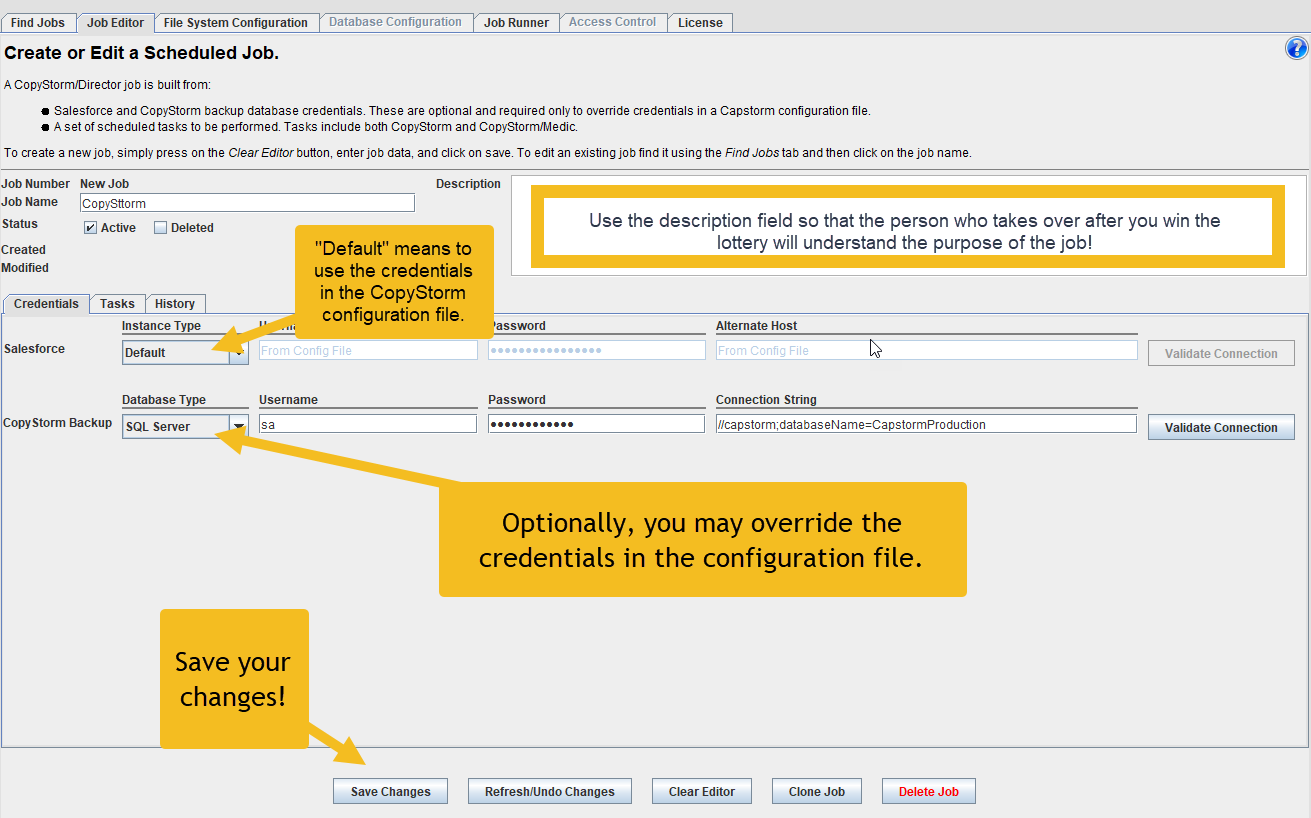
After entering a name and description, the next step is to enter credentials for both the Salesforce instance and the CopyStorm database associated with the job.
Step 2: Define Tasks and Schedules
A CopyStorm/Director job may have multiple tasks, each of which are scheduled to run at different times. In the following screenshot a single CopyStorm task has been created:
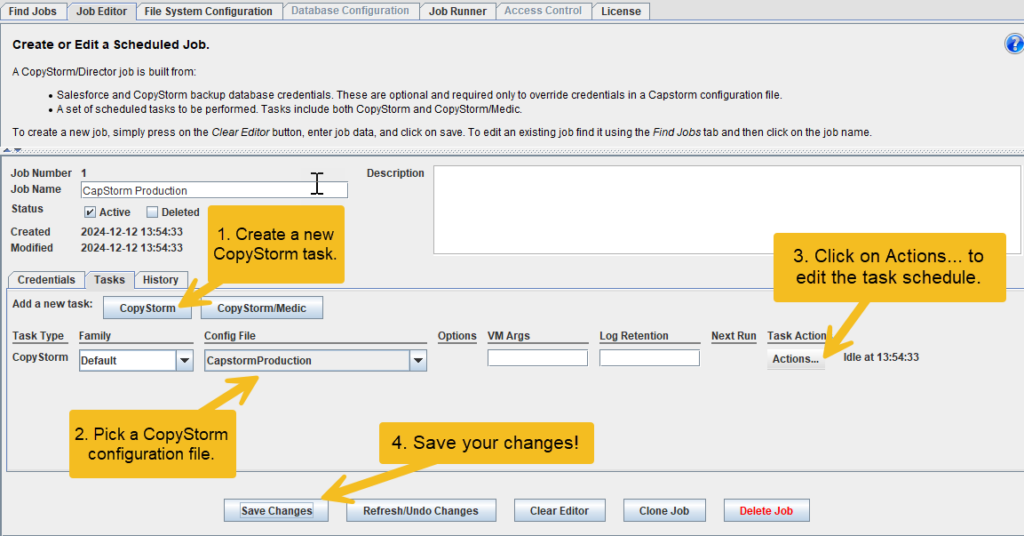
The “Log Retention” is an optional input that allows specification for the number of log files to kept for a specific task. If the input is left blank, all logs are kept.
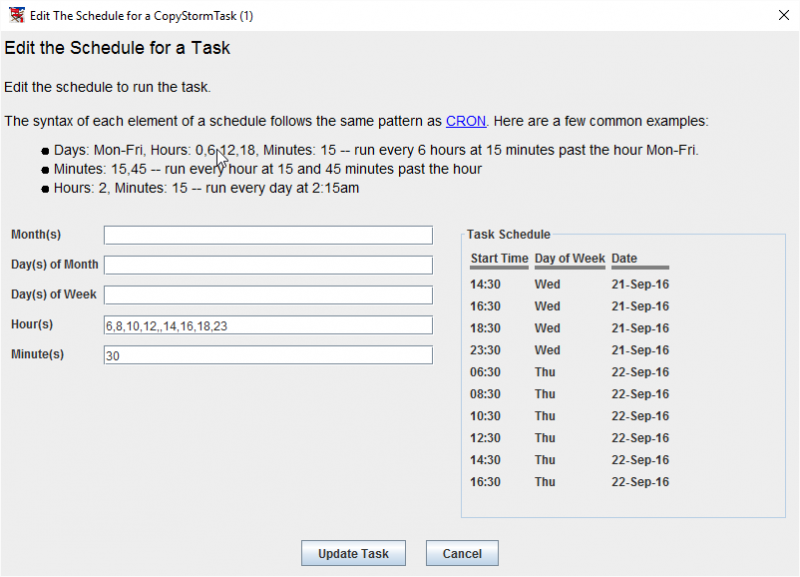
The run schedule for a task is set using the Schedule Editor. Click on the “Actions…” button to launch this editor.
Parameters on the left of the dialog control when a task should run. For help on the format click on the CRON link in the help part of the dialog. As you enter scheduling constraints the system will display the computed schedule on the right-hand side of the dialog. Note that nothing is saved unless you click on the “Update Task” button.
Adding a CopyStorm/Medic task follows the same procedure with one extra required parameter. The extra parameter is used to specify the CopyStorm/Medic tool to run.
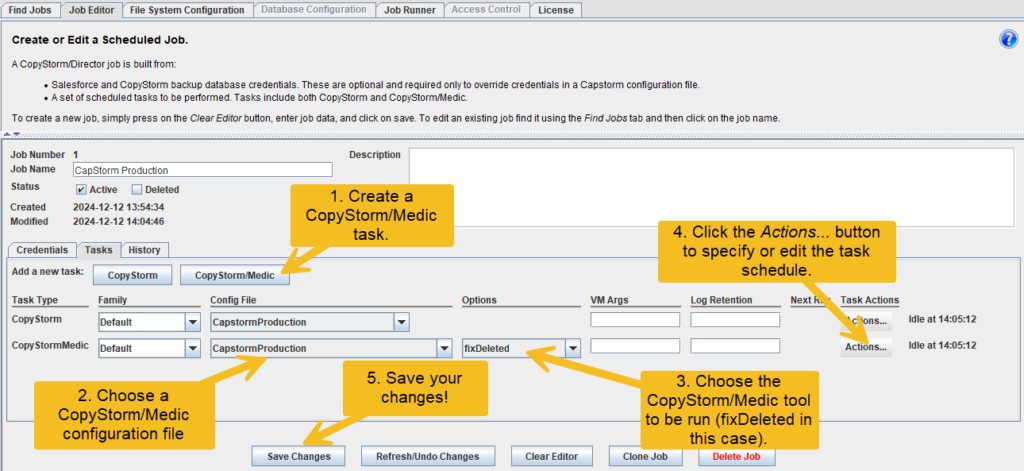
A variety of actions are available for a Task — to see the list of actions click on the “Actions…” button next to the task. Task actions include:
- “Show Schedule” shows a read-only version of the schedule for the next 10 runs of the job.
- “Edit Schedule” displays the Schedule Editor for the task.
- “Run CopyStorm GUI” launches the CopyStorm application using the configuration file associated with the task.
- “Start Task” starts the task as a background job. The background job will continue to run if the CopyStorm/Director application is closed.
- “Stop Running Task” stops the background process running this task. This option is disabled if the task is not running.
- “Delete Task” removes the task from the job.
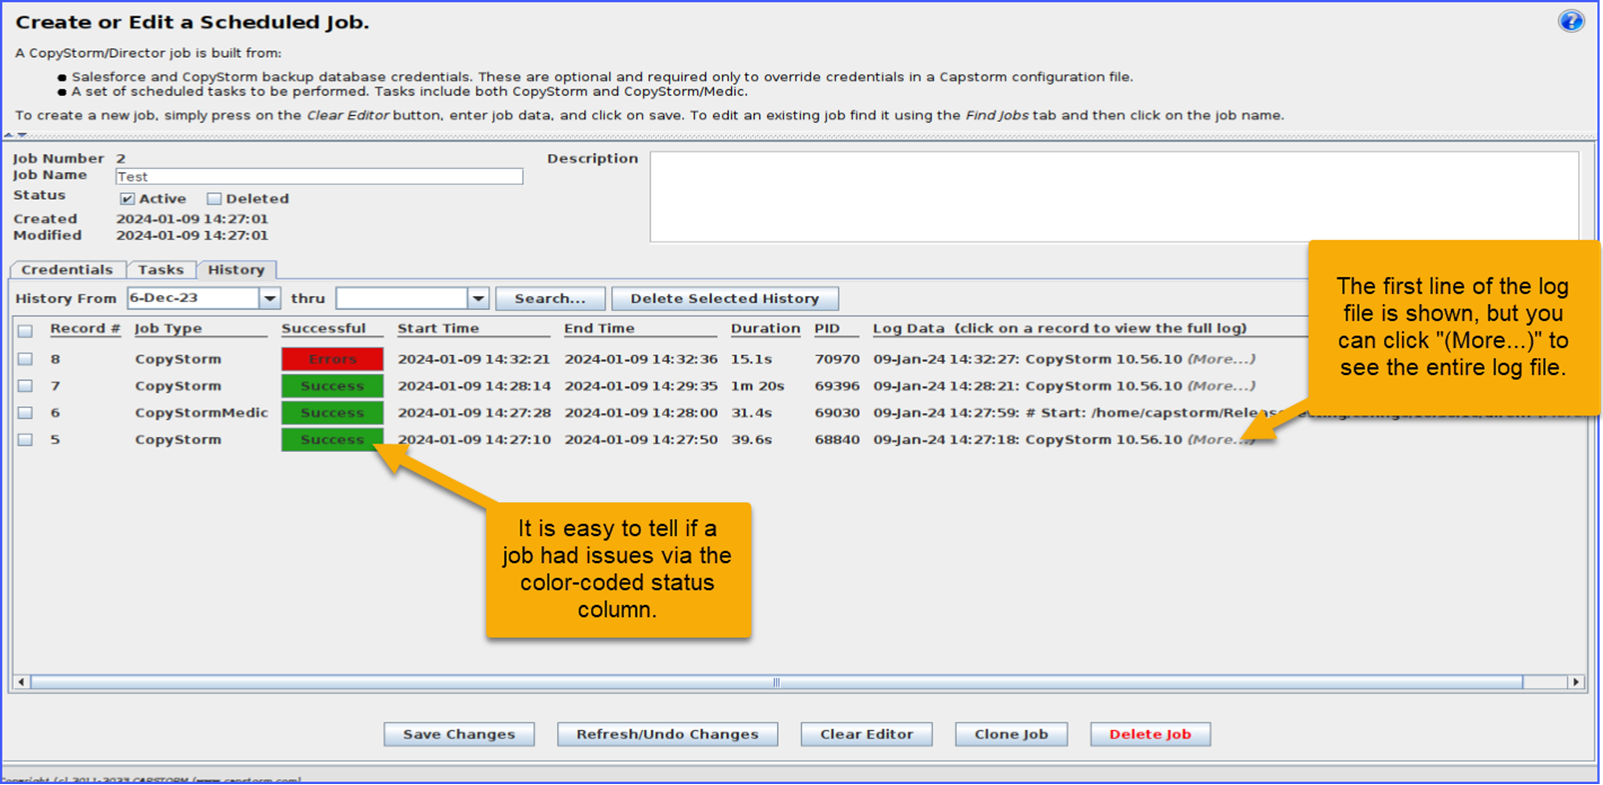
Step 3: Review Job History
The History tab displays the results of each task execution. The date range of tasks displayed can be changed using the “History From … thru” editor:
