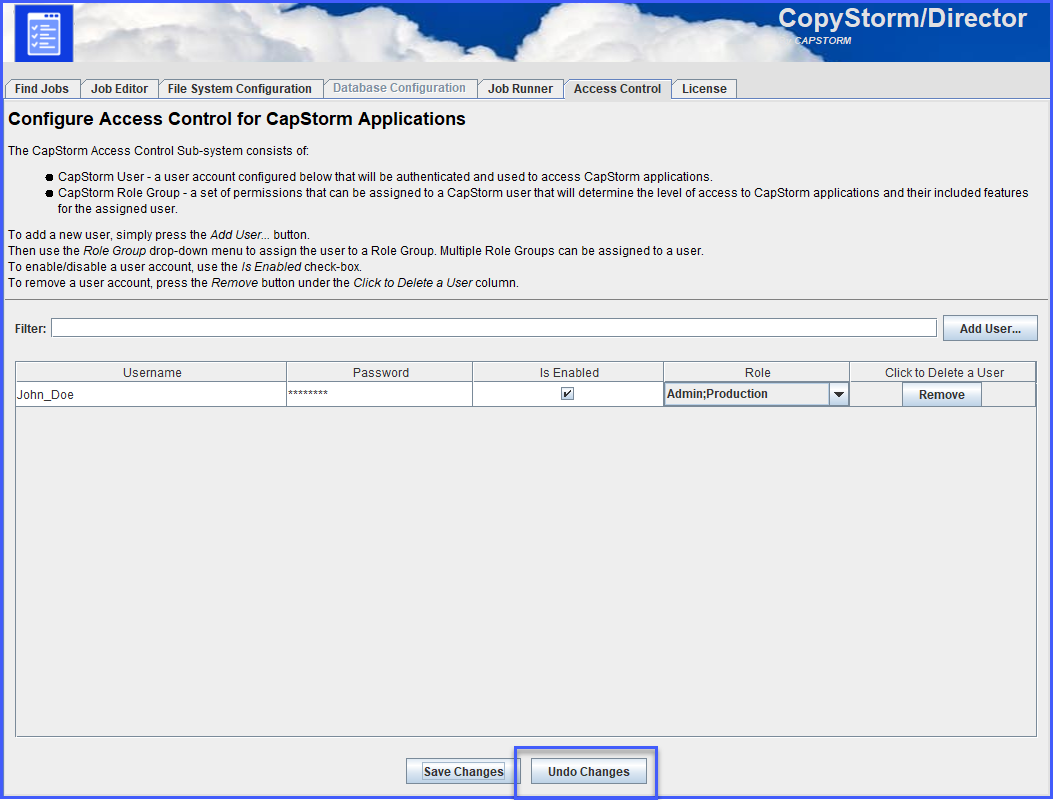
Access Control
The Access Control tab is used to configure access control/authorization for the core CapStorm applications (CopyStorm, CopyStorm/Medic, CopyStorm/Restore, and CopyStorm/Director). The Access Control editor table can be used to add new and edit existing CapStorm application users and assign pre-defined roles to users. These pre-defined roles will determine the level of access (available functionality) granted to the assigned user when using the aforementioned supported applications.
NOTE: This functionality is disabled if using the desktop Swing GUI version of the application suite. In this case, the Access Control tab will be grayed out.
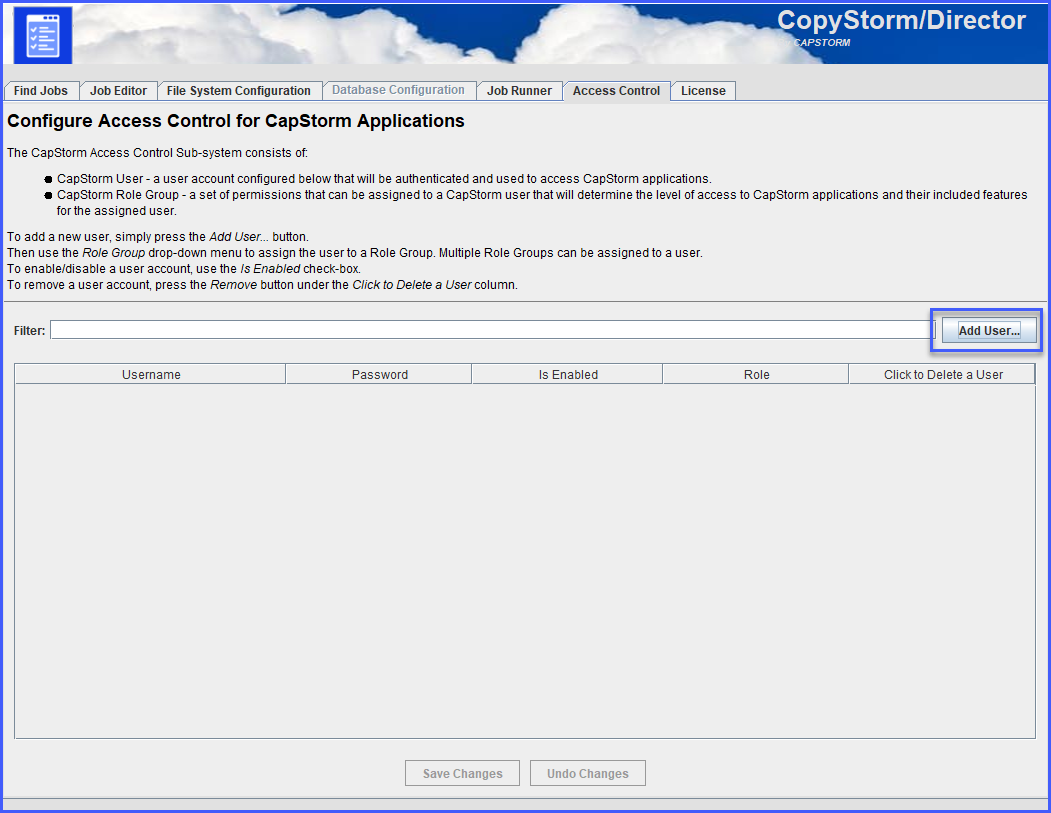
Step 1: Add a User
Click on the “Add User…” button.
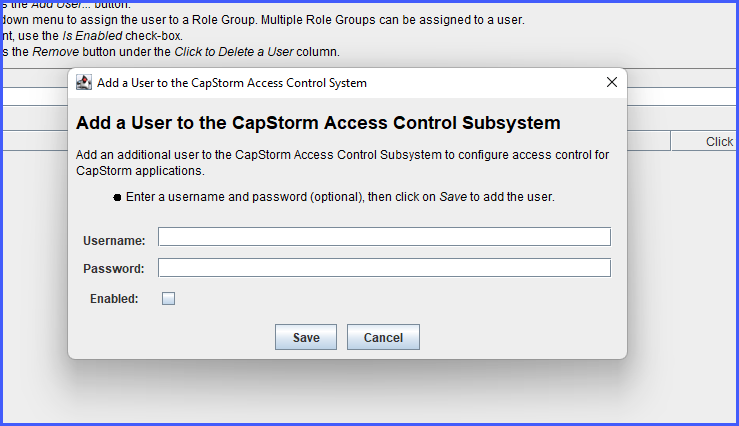
This will open a pop-up dialog where you can enter the following:
- Username — a unique username.
- Password — a strong password.
- Enabled — this checkbox determines whether the user will be enabled or disabled upon creation.
Then click the “Save” button to add the user.
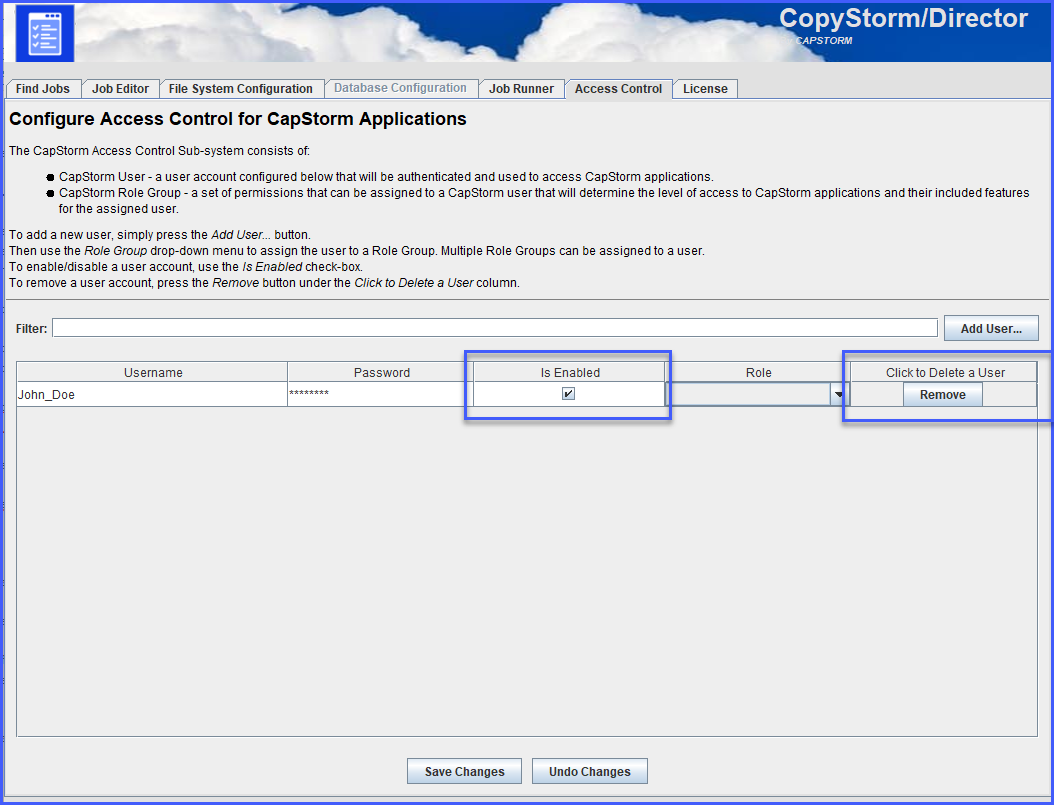
Step 2: Assign the User a Role
After adding a user, you can assign the user a role.

Three pre-defined roles are available:
- Super Admin — a top-level administrative role. A user with this role can perform any operation in any application including configuration of Access Control.
- Admin — a slightly restricted administrative role. A user with this role can perform any operation in any application except configuration of Access Control.
- Configurator — a user with this role can edit configurations for all applications, but cannot invoke any of the applications (cannot run jobs).


The “Production Enabled” check-box will enable/disable any operation that is allowed by the assigned role against a production database or Salesforce org. For example:
- A user that has been assigned the “Configurator” role but has the “Production Enabled” check-box unchecked cannot edit a production configuration.
A user can be enabled/disabled by clicking the “Is Enabled” check-box or deleted by clicking the “Remove” button.
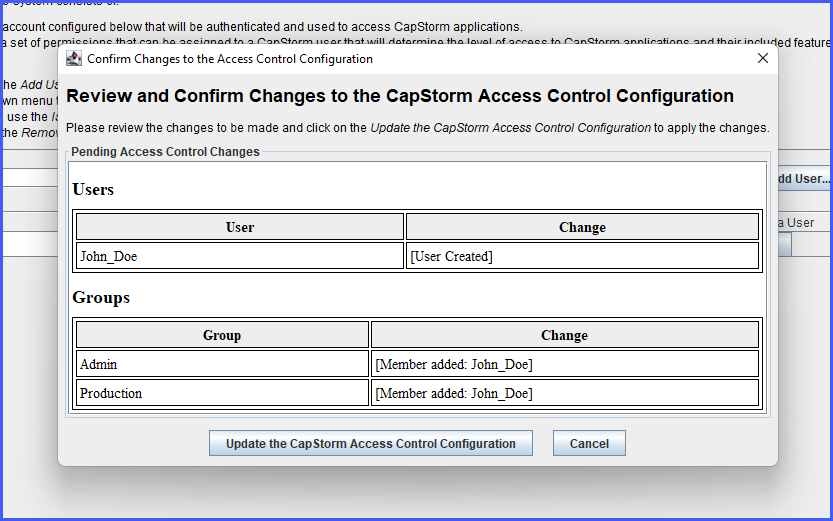
Step 3: Save Changes
When you are finished making changes to the Access Control configuration, click the “Save Changes” button at the bottom of the editor table. A pop-up dialog will appear where you can validate and confirm/deny all staged changes.
You can also undo all staged changes by clicking the “Undo Changes” button.
Access Control Database Schema
The Access Control configuration is stored and reflected in a sub-schema of the CopyStorm/Director database schema that consists of the following five tables and a single view:
- users
- authorities
- groups2
- group_authorities
- group_members
- user_group_authorities_view (view)
These tables, and the view, are required for the functionality of the Access Control subsystem to function properly.